Before proceeding with the installation, we recommended that you to use the correct hostname.
What are the requirements?
- Fresh CentOS 7, installed on your VPS/Server.
How to install Plesk or Plesk Onyx?
Step 1: Login to your server via an SSH Client with root permissions.
Then enter these 3 commands:
wget http://autoinstall.plesk.com/plesk-installer
chmod +x plesk-installer
./plesk-installer
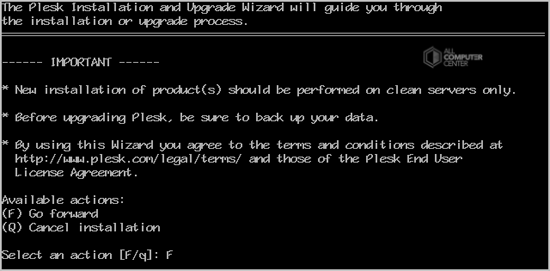
When it shows you a option, type "F" (without the quotes) and then press Enter.
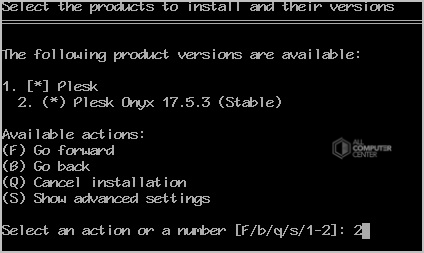
Step 2: Now you can select a version. For Plesk, type 1 and for Plesk Onyx, type 2. Then press enter. Type "F" and press enter again to go to the next option.
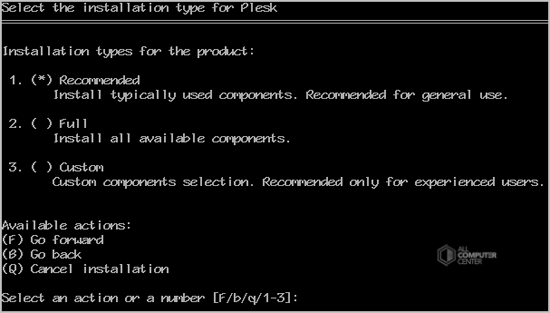
Step 3: In "Select the Installation type for Plesk" enter "F" or, in case you are familiar with what you are doing, chose the other option - installing all components by entering "2" (without the quotes) and press "F'.
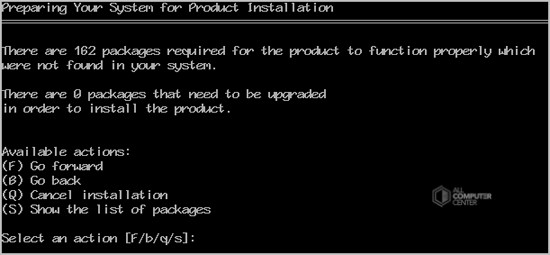
Step 4: Press "F" again. The installation will begin, which can take as long as 20 to 30 minutes. If it shows a hostname-related error, do not quit the installation. Sometimes Plesk only shows warnings and provides you with an instruction of how to fix your problem.
Once Plesk is installed, it will show display a congratulations message with your Plesk control panel URL.
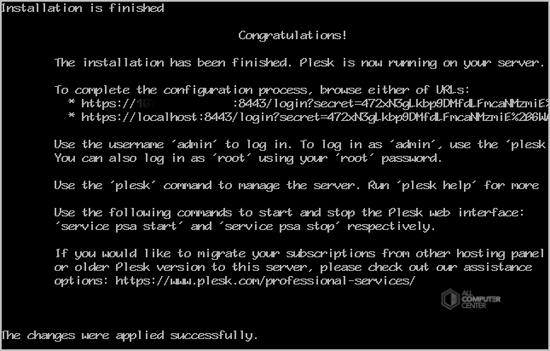
Copy the full URL provided by Plesk and paste it into the browser. If the URL doesn"t work, you will need to open a port in your firewall. You can check it by disabling the firewall and then accessing the URL. If it starts working, it means you need to open a Plesk port in the firewall.
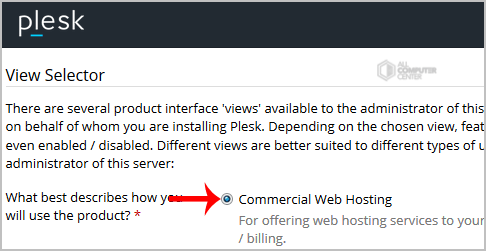
Step 5: From the View Selector, choose your preferred option. We are going to use our Plesk control panel for selling hosting plans so we should select a "Commercial Web Hosting" option and then scroll down and press "OK".
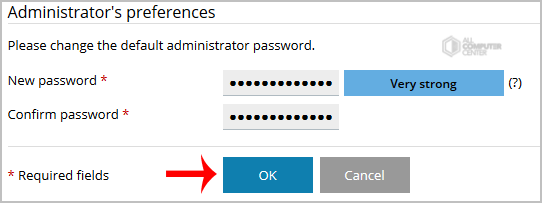
Step 6: Scroll down to the end of page, generate a new password or enter it manually, then press "OK". Make sure that you stored this password in a safe place. In the next step, enter your administrative information such as an email address, a contact name and then press "OK".
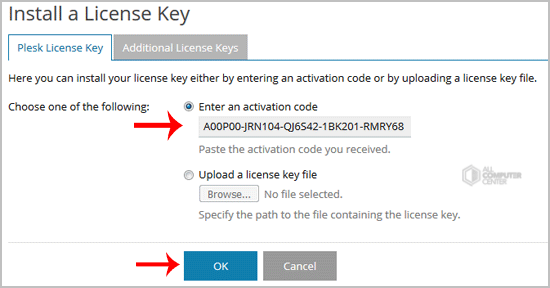
Step 7: Now click on "Install Key", enter your Plesk Activation code and press ok to save it. You can also use a trial key or use your own key.
Congratulations, you have successfully installed and configured Plesk.